Headless CMS > Live preview
Live Preview
Add a live preview pane to the content entry form so editors can see how an entry will render on the frontend as they type.
- what the Live Preview extension does and how it’s structured
- how to install it and connect a frontend app that renders the preview
- how to enable live preview for your own content models
 Webiny Headless CMS - Live preview
Overview
Editing in a headless CMS means working against structured fields with no direct view of the rendered result. You fill in a title, a slug, and some content blocks, then switch to the frontend (or publish) to check how it actually looks.
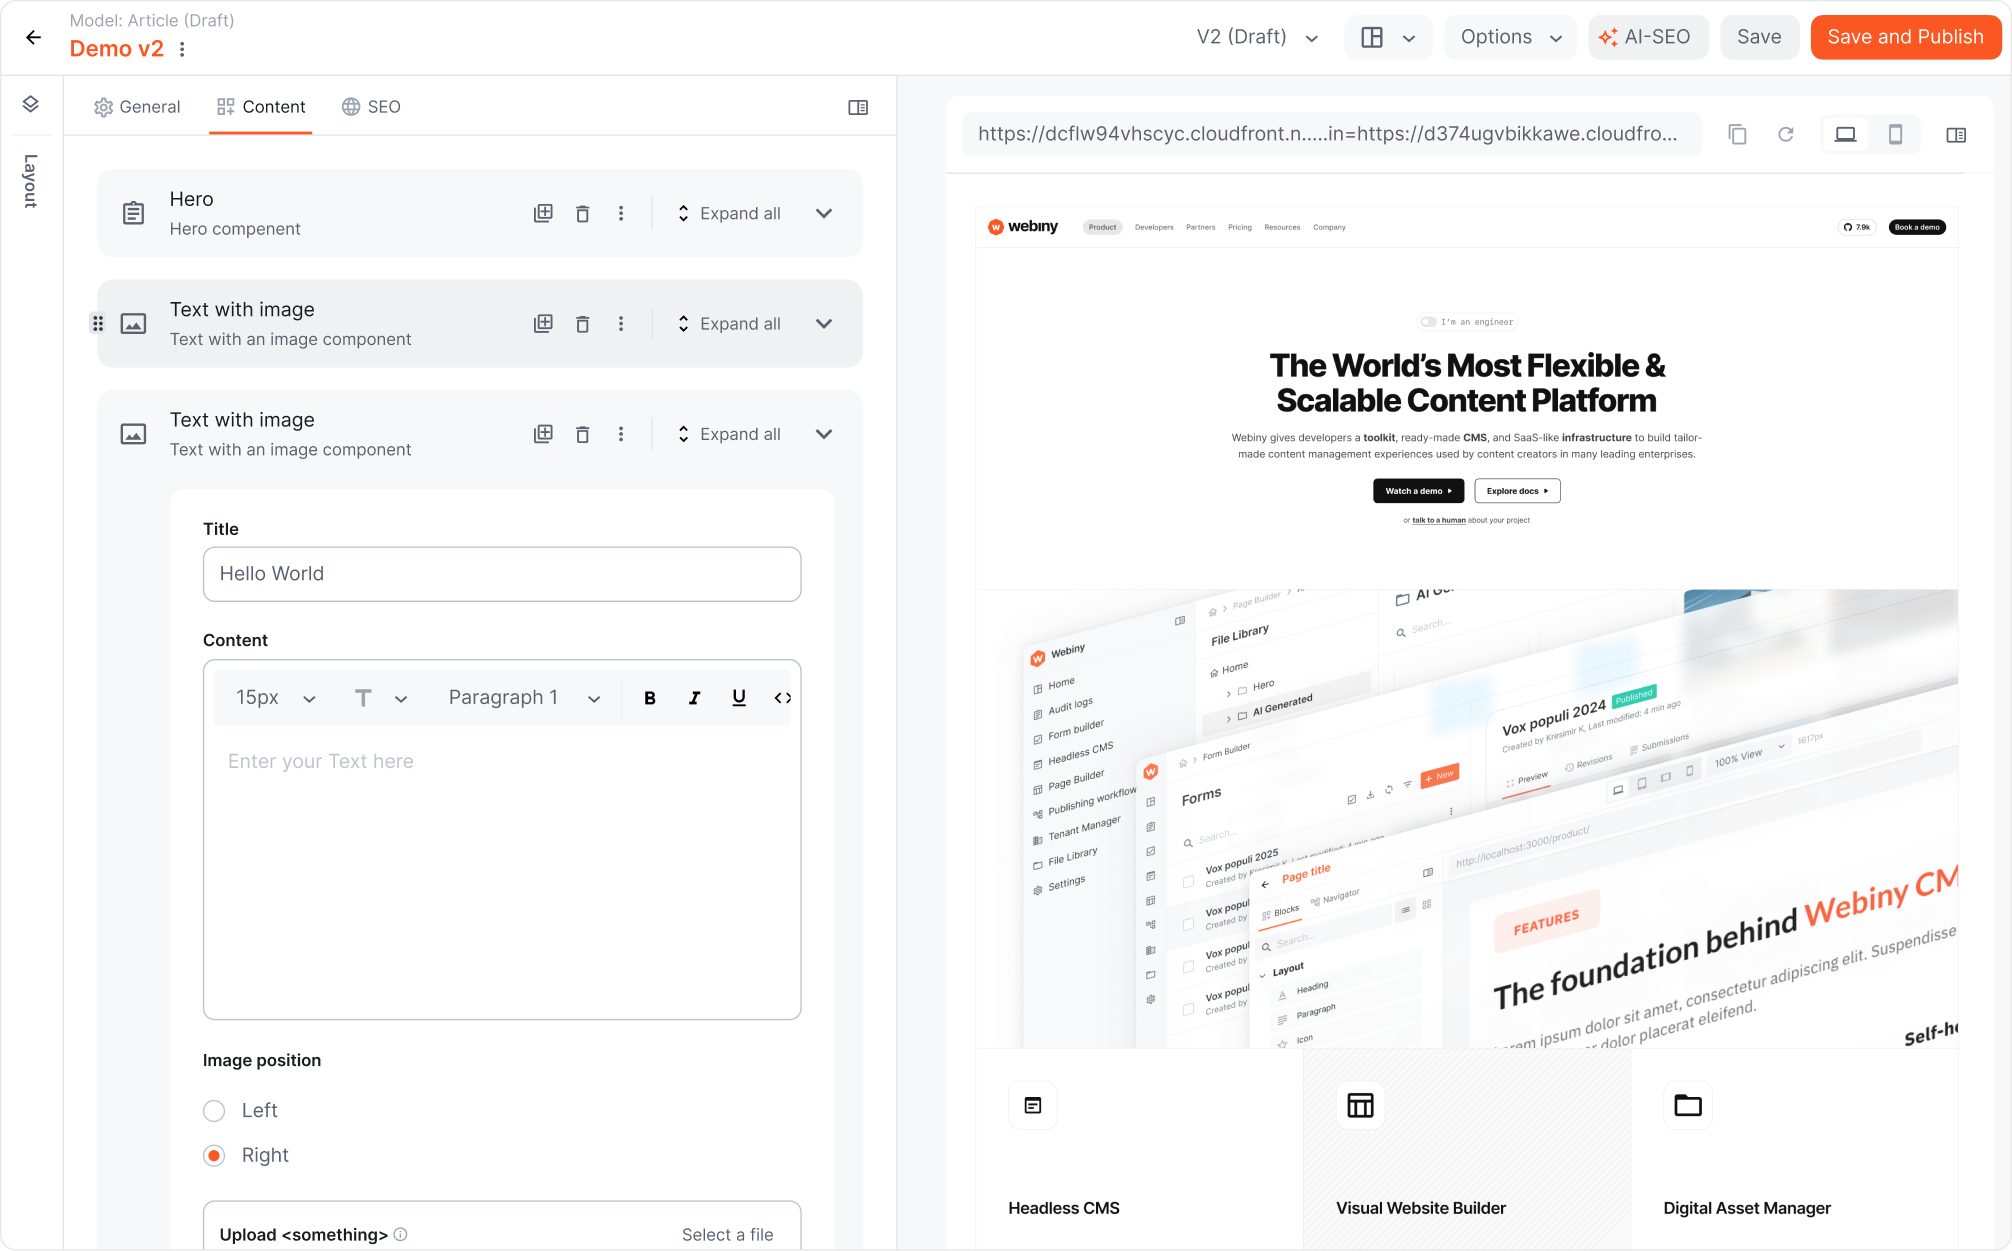
The Live Preview extension closes that gap. It adds a preview pane to the content entry form in the Admin app. As an editor changes the entry, the pane updates to show how that entry will render on the frontend, with no need to publish or refresh.
This is a packaged extension you install into your project, not a built-in toggle. It ships a working setup you can use as-is for the included Article model, and a small amount of configuration to extend it to your own models.
How It Works
The extension has two parts:
- An Admin interface that adds a preview pane to the left of the content entry form. The pane embeds your frontend app in an iframe and passes the current entry to it on every change.
- An Article content model with a few fields, included so you have something to preview straight after installing.
The rendering itself happens in your own frontend app. The pane sends the live entry data to that app, and the app renders it using your real components and styles. Because of this split, the preview reflects exactly what your site will show, and you keep full control over how content is rendered. You provide and host the frontend; the extension handles the editor side and the data sync.
The rendering side is framework agnostic. The reference app uses Next.js, and the same approach adapts to Nuxt, Angular, or another framework that can read the entry data and render a route.
Install the Extension
Run the install command inside your Webiny project:
Installing the extension adds a new content model (Article), so redeploy your API to register it with the system:
Set Up the Preview Frontend
The preview pane needs a frontend app to render entries. Webiny provides a reference Next.js app on the live-preview-ext branch. Clone it, check out that branch, and install dependencies:
Copy the example environment file:
Then open .env.local and set each variable to match your Webiny instance. The example file lists every value the app needs, including the API endpoint it reads content from.
To create the API key go to Settings > API Keys and create a key that has Read access to the Headless CMS data. That value goes into the WEBINY_API_TOKEN env variable.
For the WEBINY_API_ENDPOINT you need to extract just the domain name from the Headless CMS url that you’ll find in the GraphQL Playground (Dev Tools > GraphQL Playground). For example if the url is ”https://d3ifxxxxxxx.cloudfront.net/graphql” , copy just the domain name without the trailing slash
 https://d3ifxxxxxxx.cloudfront.net.
With the API deployed and the frontend running, the preview pane has somewhere to render.
Try It Out
Open the Admin app and go to the Article model. Create a new entry, or open an existing one. The preview pane appears on the left of the entry form, and the fields on the right. As you edit a field, the pane re-renders to show the updated result.
Add Live Preview to Your Own Models
By default the preview pane is shown only for the Article model. Enabling it for one of your own models takes three small edits inside the extension.
First, register the model’s id. In extensions/livePreview/admin/AddPreviewPane.tsx, add your model id to the list:
Next, map the preview and slug paths. In extensions/livePreview/admin/getPreviewUrl.ts, add an entry to previewPaths for the route in your frontend that renders the preview iframe for this model, and an entry to slugPaths for the base path that the model’s entries live under:
Finally, point the extension at your frontend. In the same file, update the getDomain function so it returns the live domain of your frontend app.
How Slugs Become Routes
slugPaths works together with the value of each entry’s slug field to build the full route your frontend renders. If an entry in the example model has a slug of /test/path, the composed route is /examples/test/path. Your frontend needs to handle that route and render the page for it.
This keeps the preview and the published page on the same routing rules, so what an editor sees in the pane matches what a visitor will reach.
Notes
The preview is only as accurate as the frontend that renders it. Keep the routes in your frontend in sync with the previewPaths you configure, and make sure the frontend can render an unpublished entry, since the pane sends the entry while it’s still being edited.
The full extension source is available on GitHub at webiny/extensions, and the reference Next.js frontend is at webiny/learn-webiny-nextjs-app on the live-preview-ext branch.